I wanted to share a super easy technique for bead weaving that I used to create an adorable Swarovski crystal bracelet, at less than a tenth the price.
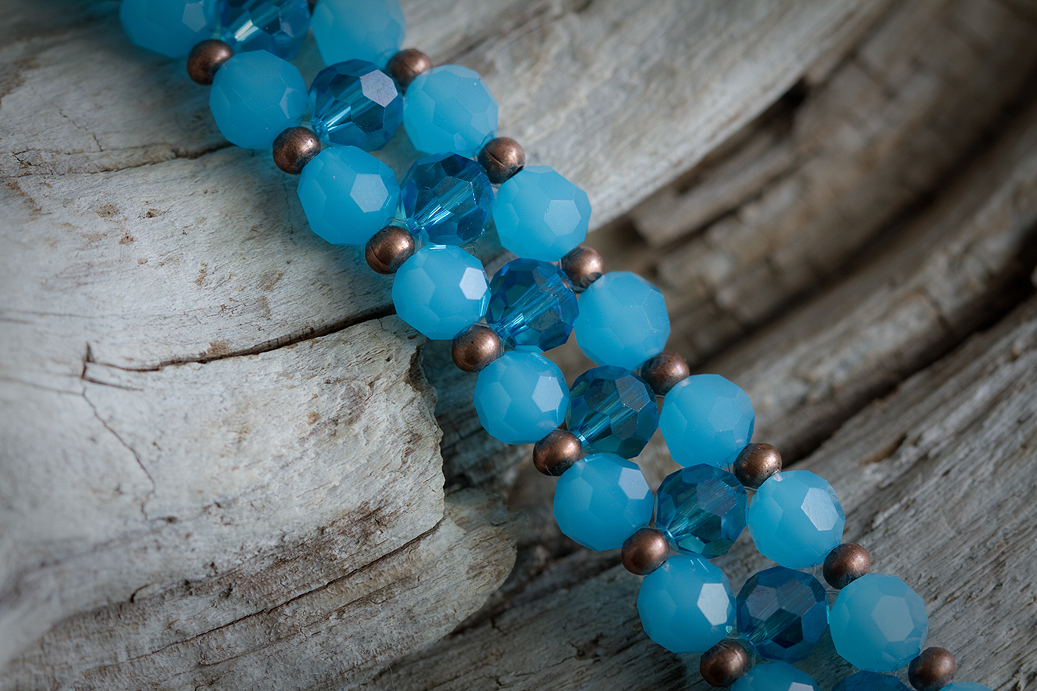
I needed 32 large frosted Swarovski beads, 16 clear ones and 32 small copper beads – you might need more depending on what size you want to make. Play around with different beads – this technique will work with almost anything!
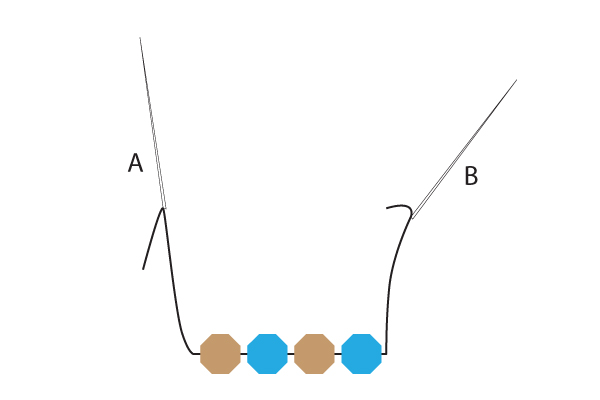
Step 1 – thread a really long piece of beading string with 2 needles – one at each end. Pick up one bead in colour A, one colour B, another colour A and end with one more colour B.
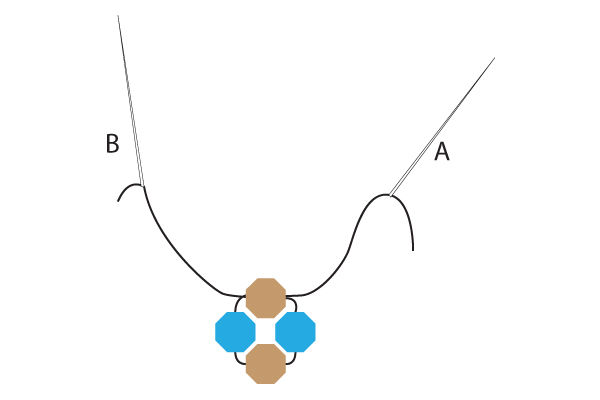
Step 2 – Insert needle B back through the last bead added, so now both ends of your threads are coming out of one colour A bead, like so:
Step 3 – Pick up one colour B bead followed by a colour A bead on needle B . Pick up one colour B bead with needle A.
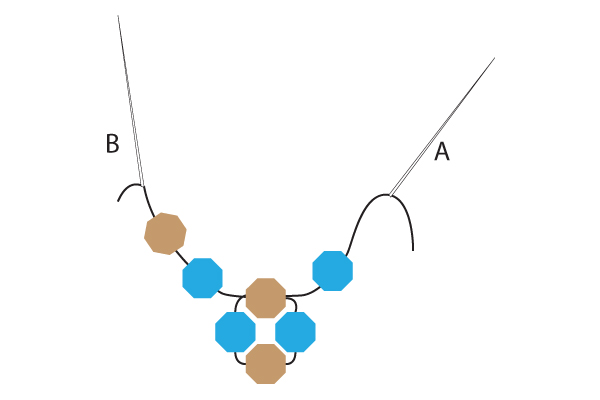
Step 4 – Take needle A through the colour A bead.

Repeat steps 3 and 4 until it’s the length you want:
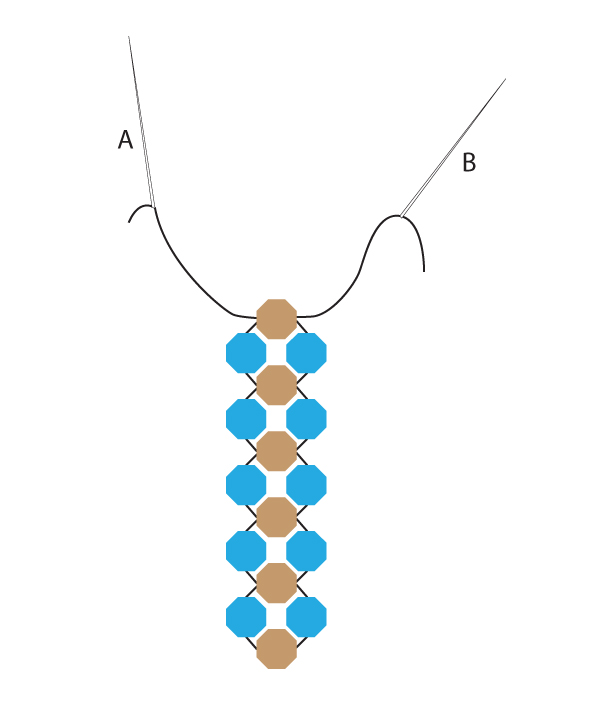
When it’s a good fit, pass both your needles through the base of your clasp and back through the end bead. You are now ready to add the side beads. Make sure they’re small enough to fit comfortably. I recommend doing both sides of the bracelet at the same time. You will pass the needles back though the last colour B bead, pick up one side bead with each needle and go through the next colour B bead, like so:
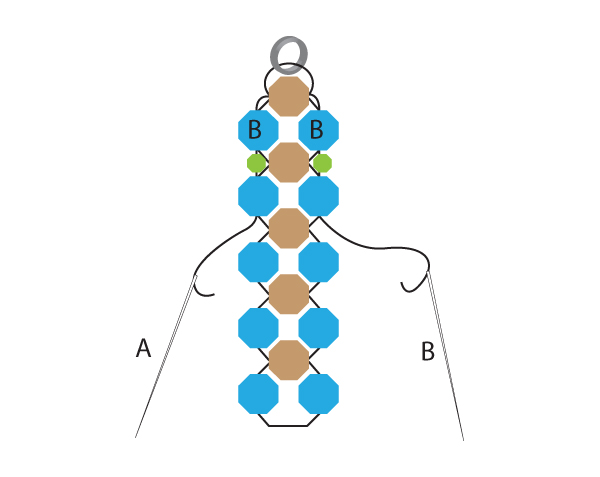
Keep going this way until both sides are done:
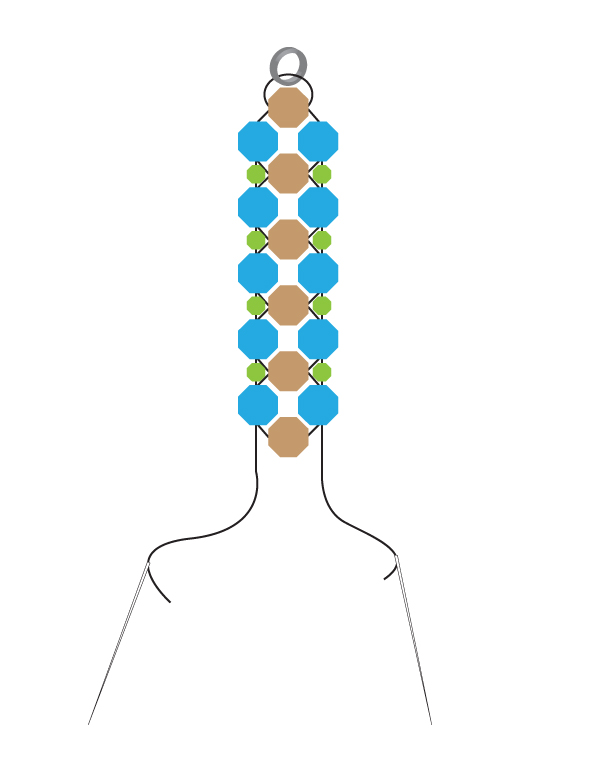
Tie off the end by passing through the end bead and the other end of your chosen clasp a few times. Weave your ends back through the bracelet after tying them off.
And voila! Your own beaded bracelet!
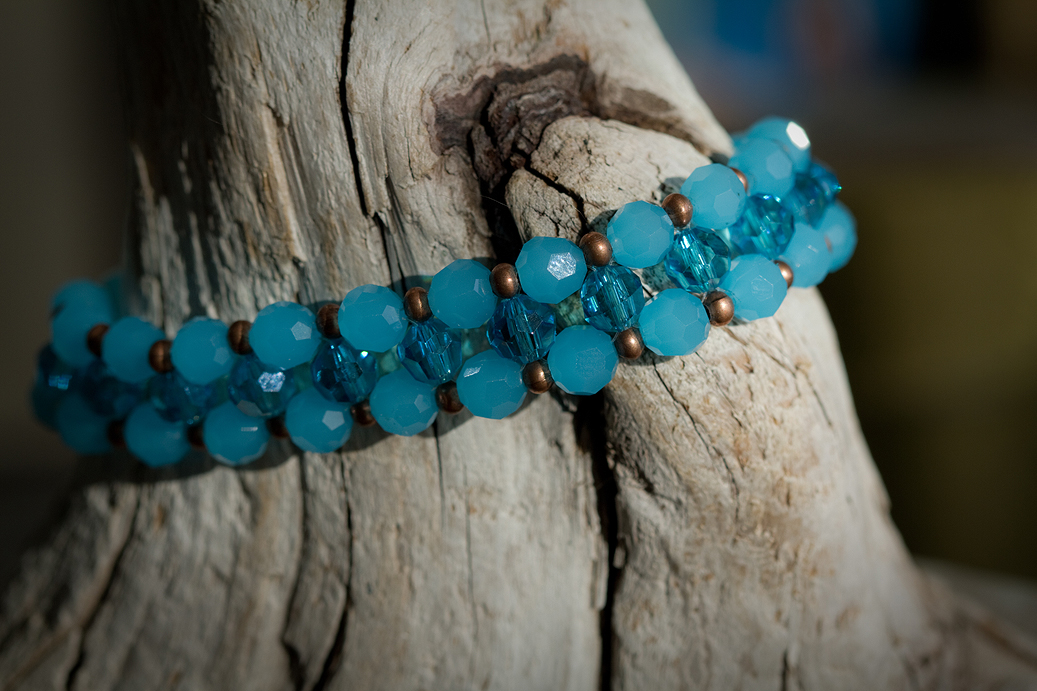
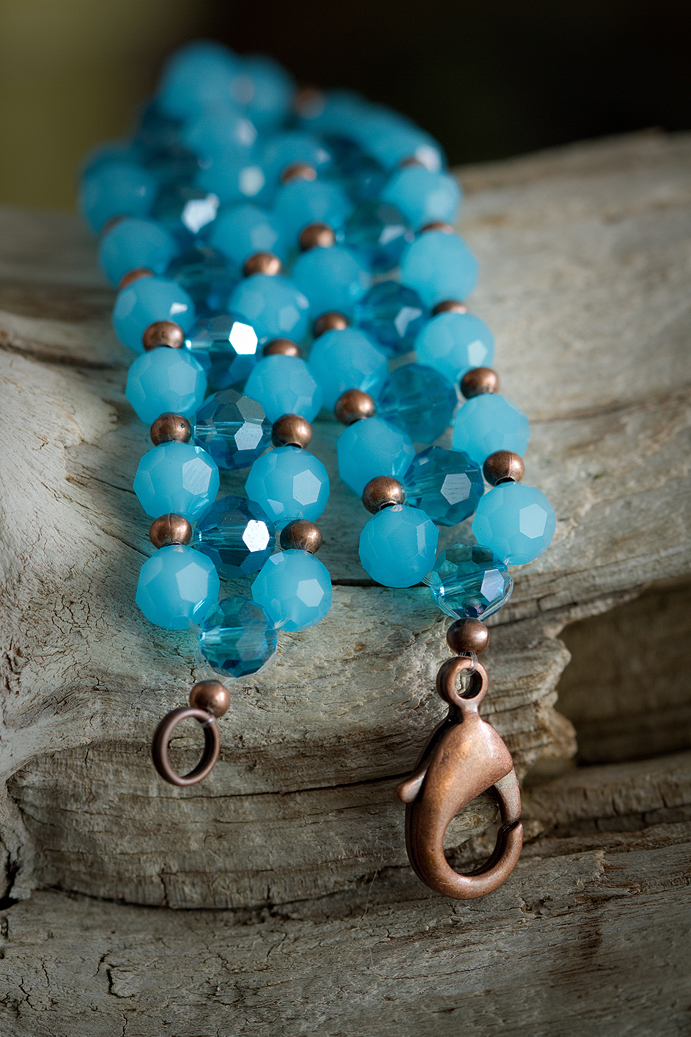
Enjoy :) And feel free to write to me with any questions.
Don’t forget about my contest folks – tell me your favourite craft for a chance to win a lovely resin necklace from the Blue Brick! Click here for details.