I love the idea of ombre yarns, and since I got weaving I’ve been dreaming of a beautiful ombre scarf, plain weave, with a neutral warp, transitioning over the course of a long, fine fabric.
Laurie from The Black Lamb had given me 2 skeins of a beautiful, natural merino silk sock yarn when I bought the loom, so last night I decided to experiment with my own ombre dye job. Here are the details of how I did it, and I’ll definitely be trying to do it again (with better photos) in the near future!
*Before you start – I’m using a silk merino superwash blend. If you’re not using a superwash, then be super gentle, because this process can be hard on your yarn and you don’t want it to felt!
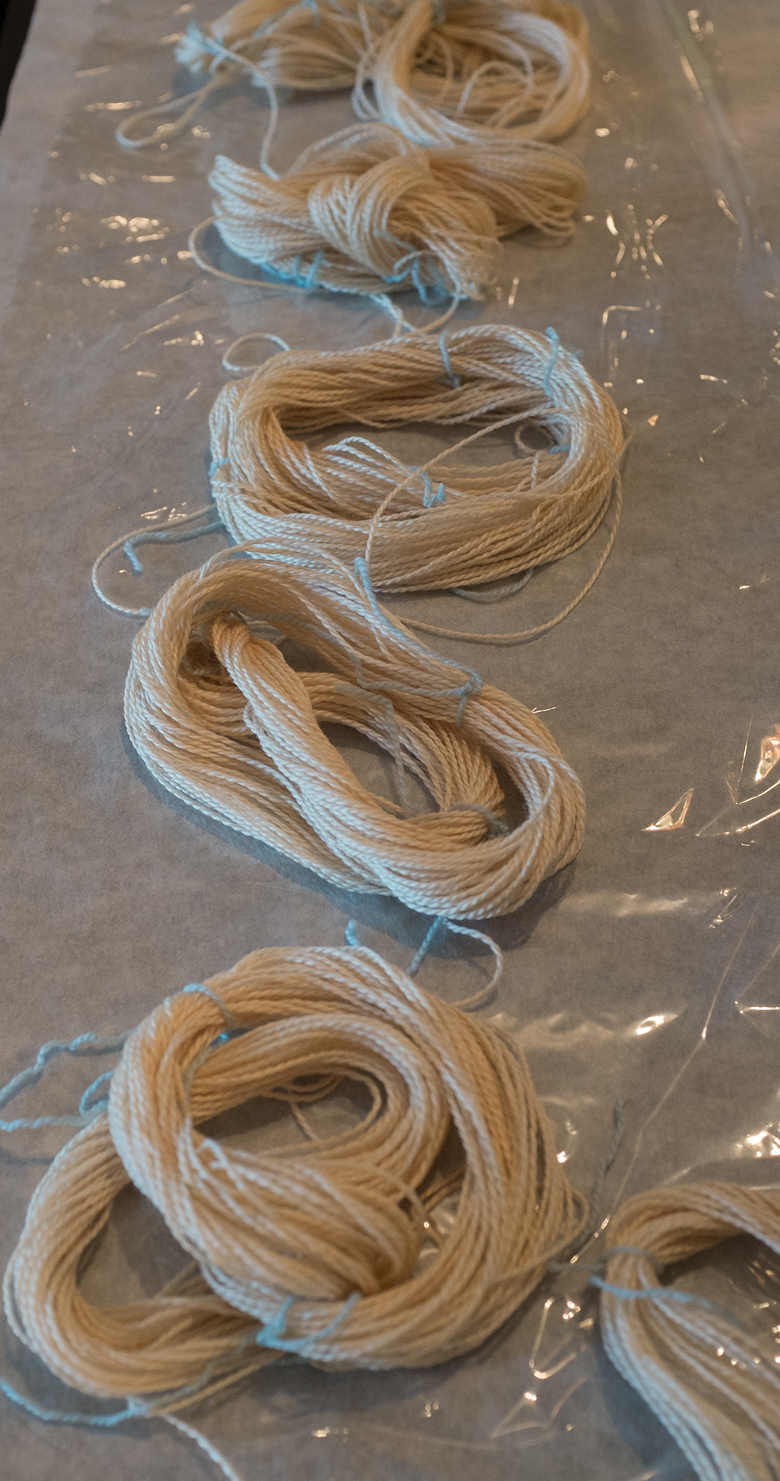
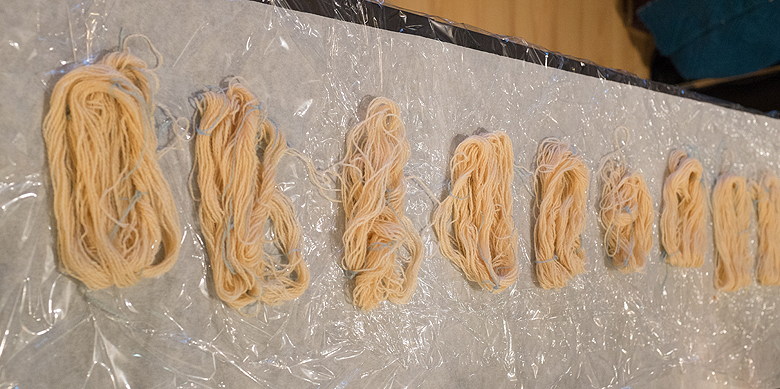
Divide your yarn into mini-skeins. There is no real easy or fast way to do this–I recommend putting the skein on a swift if you’ve got one, and unwinding it onto a niddy noddy, chair, or even your arm. I was not very scientific about mine – I wrapped it around my arm 40 times, tied off my mini skein and then, without cutting the yarn, began another 40 wrap skein. This gave me 10, more or less equal mini-skeins that were all still attached to each other by a length of yarn.
Fill a bowl with a water-vinegar mix. I’m using 3 parts water to one part vinegar. I found that 6 cups of water and 2 cups of vinegar were enough, in my case, to cover my yarn completely. I put my 10 mini-skeins in the mix and let it soak for about 30 minutes.
On my dining table I laid out a few strips of wax paper (to protect my table) and then covered it in plastic cling-wrap.
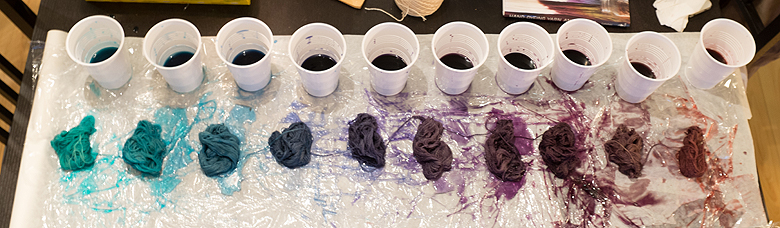
While the yarn was soaking, I prepared my dyes. I set up 10 plastic cups (because I’ve got 10 mini-skeins, you might need a different number) and put about 1/3 cup of water into each one. I’m using a combination of food dye and Jaquard Acid dye to create my colours.
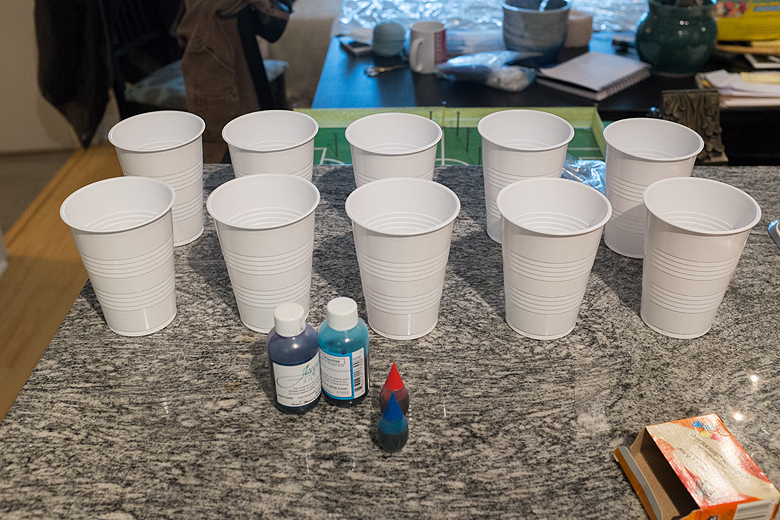

To graduate the colours, here’s what I did:
- Cup 1: 3 parts Jaquard Turquoise
- Cup 2: 2 parts Jaquard Turquoise to 1 part Jaquard Blue
- Cup 3: 1 part Jaquard Turquoise to 2 parts Jaquard Blue
- Cup 4: 3 parts Jaquard Blue
- Cup 5: 3 parts Jaquard Blue with 1 drop of red food colouring
- Cup 6: 3 parts Jaquard Blue with 2 drops of red food colouring
- Cup 7: 2 parts Jaquard Blue with 3 drop of red food colouring
- Cup 8: 1 part Jaquard Blue with 4 drop of red food colouring
- Cup 9: 1 part Jaquard Blue with 5 drop of red food colouring
- Cup 10: 1 part Jaquard Blue with 6 drop of red food colouring
The practical upshot of this is that you change your colour mix gradually over however many cups you’ve got. You can control the degree of change and the number of steps as needed to get the colour shift you’re looking for. To test whether my colours were shifting the way I wanted them to, I dipped a small piece of paper towel in each cup and laid the paper towels out in a row to see how the colour change looked. This is a good time to tweak your colour mixes if you need to.
After the requisite 30 minutes, I took my yarn out of the vinegar bath and laid it out on the plastic wrap, gently separating the mini skeins from one another.
I placed a cup in front of every skein, and put on rubber gloves to protect my hands. Very gently, and starting with a very small amount, I poured the dye from each cup onto the skein in front of it, ‘squishing’ the yarn gently as I did so to make sure the inner fibers were receiving dye as well.
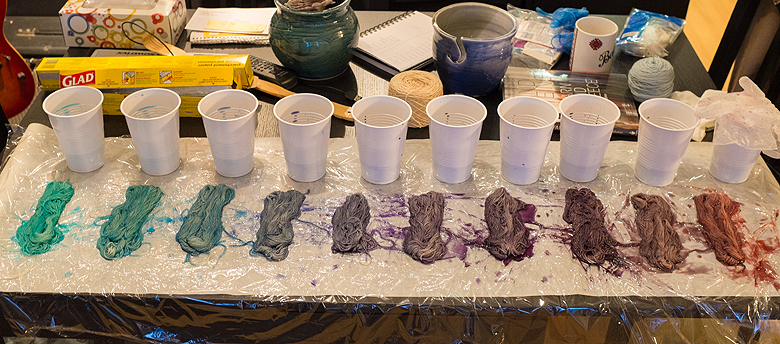
I continued up the line until all the yarn was treated and then started back at the beginning again, adding dye until the yarn was fully saturated, being careful not to allow the little pools of dye to mix with each other more than I could help. Having said that, you do want to make sure the little lengths of yarn that connect one skein to another are receiving dye as well!

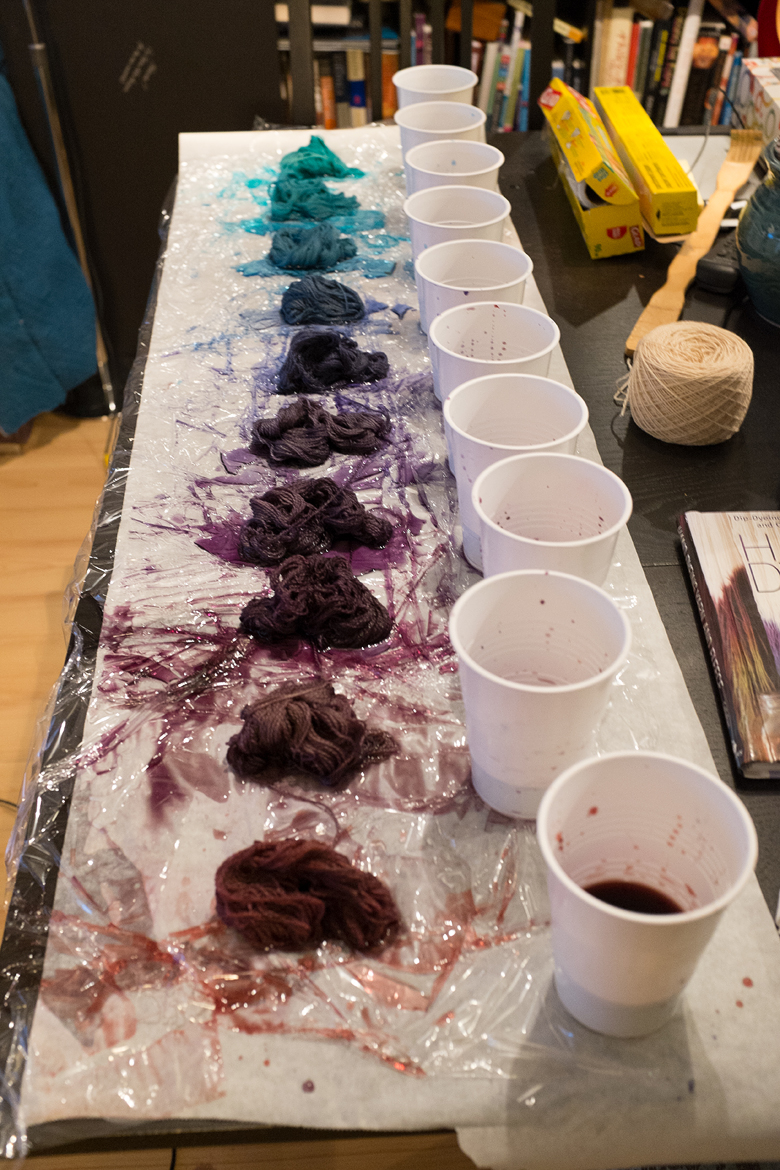
When the yarn had absorbed as much dye as it could, I pulled up the sides of my cling wrap and used it to wrap the yarn, as one whole package, and I put that package in a microwave safe bowl to keep it from leaking everywhere.
Place the bowl in the microwave and nuke it, one minute at a time, checking in between to see if your dye bath is ‘exhausted’ (that is, if the water is coming out clear, or if it’s still full of dye). Once you’re getting clear water, take it out of the microwave and put it in your sink to cool off.
ONCE THE YARN IS COOL and not before (you’d be surprised how hot it gets) gently open the plastic wrap and give your yarn a cool water rinse with a little mild detergent. Don’t let the water run directly on the yarn if you’re not using superwash – even this can cause felting.
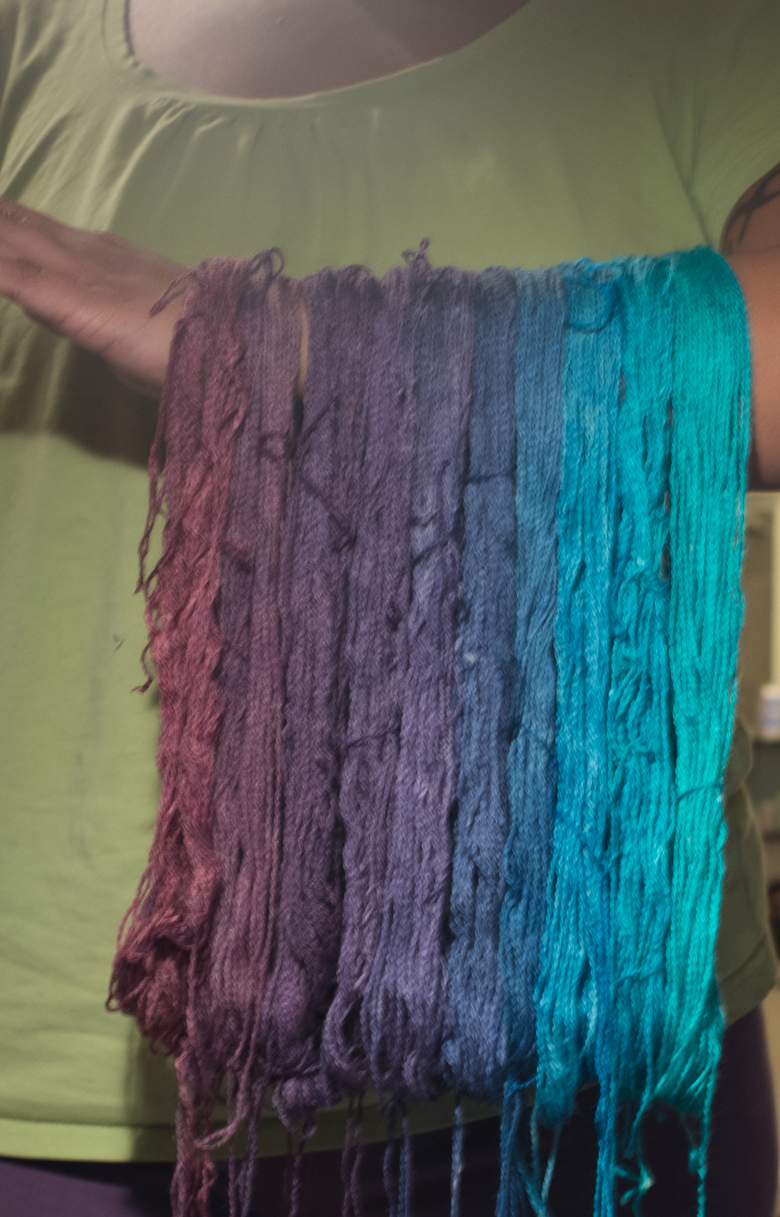
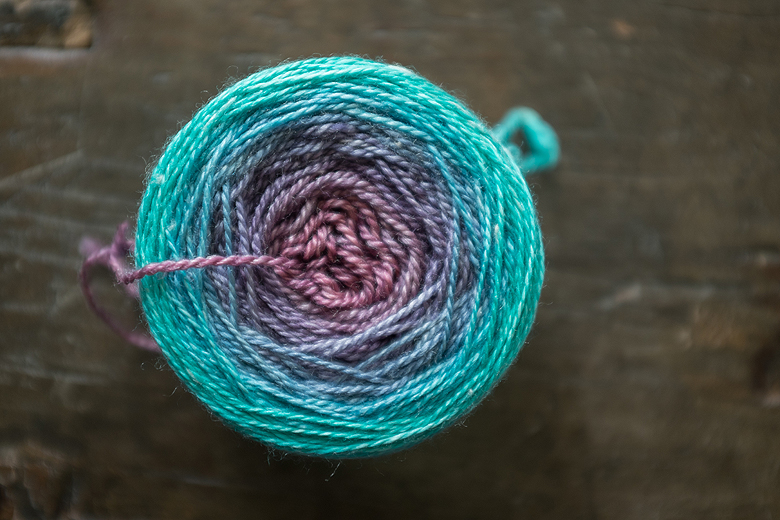
Crappy cellphone shot of my finished work
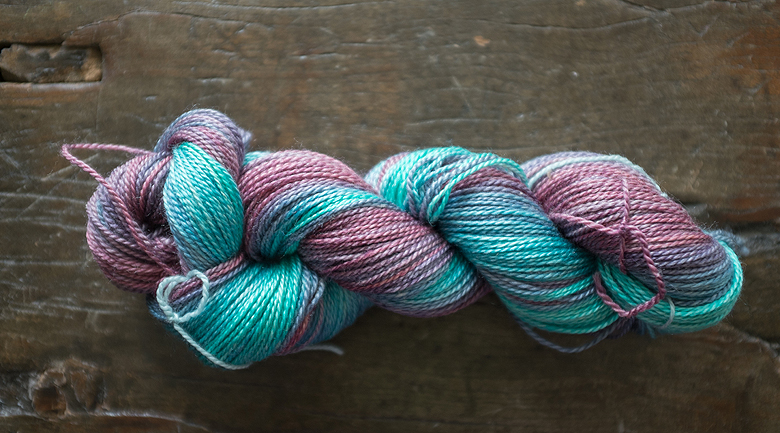
Admire your handiwork. You should be feeling pretty rockstar at this point.
Gently press out the excess water with a towel (that you don’t care about) and hang it to dry. Once dry, undo your little ties and re-wind the mini skeins into one big skein. You’re done!